custom_dialog (+custom_toast)
개발포스팅은 언제나 유통기한을 조심하세요.
Github : https://github.com/junghun9102/AndroidTemplate
Branch : ui/custom_dialog
junghun9102/AndroidTemplate
Contribute to junghun9102/AndroidTemplate development by creating an account on GitHub.
github.com
Activity 외에 필수적으로 사용하게 되는 Toast, Dialog 등이 있다.
앱 디자인에 더 완벽하게 맞추고 싶을 수 있다.
커스텀해서 사용해보자!
CustomToast

view_toast.xml
<LinearLayout xmlns:android="http://schemas.android.com/apk/res/android"
    android:orientation="vertical"
    android:layout_width="match_parent"
    android:layout_height="match_parent">

    <TextView
        android:id="@+id/tv_view_toast"
        android:layout_width="match_parent"
        android:layout_height="wrap_content"
        android:layout_marginStart="10dp"
        android:layout_marginEnd="10dp"
        android:padding="15dp"
        android:background="#7000"
        android:gravity="center"
        android:textColor="@android:color/white"/>

</LinearLayout>
원하는 토스트 레이아웃을 만든다
CustomToast.kt
object CustomToast {

    fun show(context: Context, stringResId: Int, duration: Int = Toast.LENGTH_SHORT) = show(context, context.getString(stringResId), duration)

    private fun show(context: Context, content: String, duration: Int = Toast.LENGTH_SHORT) {
        val view = LayoutInflater.from(context).inflate(R.layout.view_toast, null)
        view.tv_view_toast.text = content

        Toast(context).apply {
            setGravity(
                Gravity.FILL_HORIZONTAL or Gravity.BOTTOM,
                0,
                context.dimen(R.dimen.custom_toast_bottom_margin)
            )
            this.duration = duration
            setView(view)
        }.show()
    }

}
dimen에 bottomMargin을 정해두고 사용했다.
(혹시 모르시는 분이 있을까봐 context.dimen은 anko 라이브러리)
토스트 내용은 하드코딩하지 않는 한 resource 레퍼런스만
받아서 사용하기 때문에 String으로 받는 함수는 private으로 묶어 두었다.
ContextExtensions.kt
fun Context.showToast(resId: Int) = CustomToast.show(this, resId)
MainActivity.kt
    private fun initViews() {
        btn_main_toast.setOnClickListener {
            showToast(R.string.app_name)
        }
    }
사용하기 쉽도록 extension을 추가했다.
CustomDialog
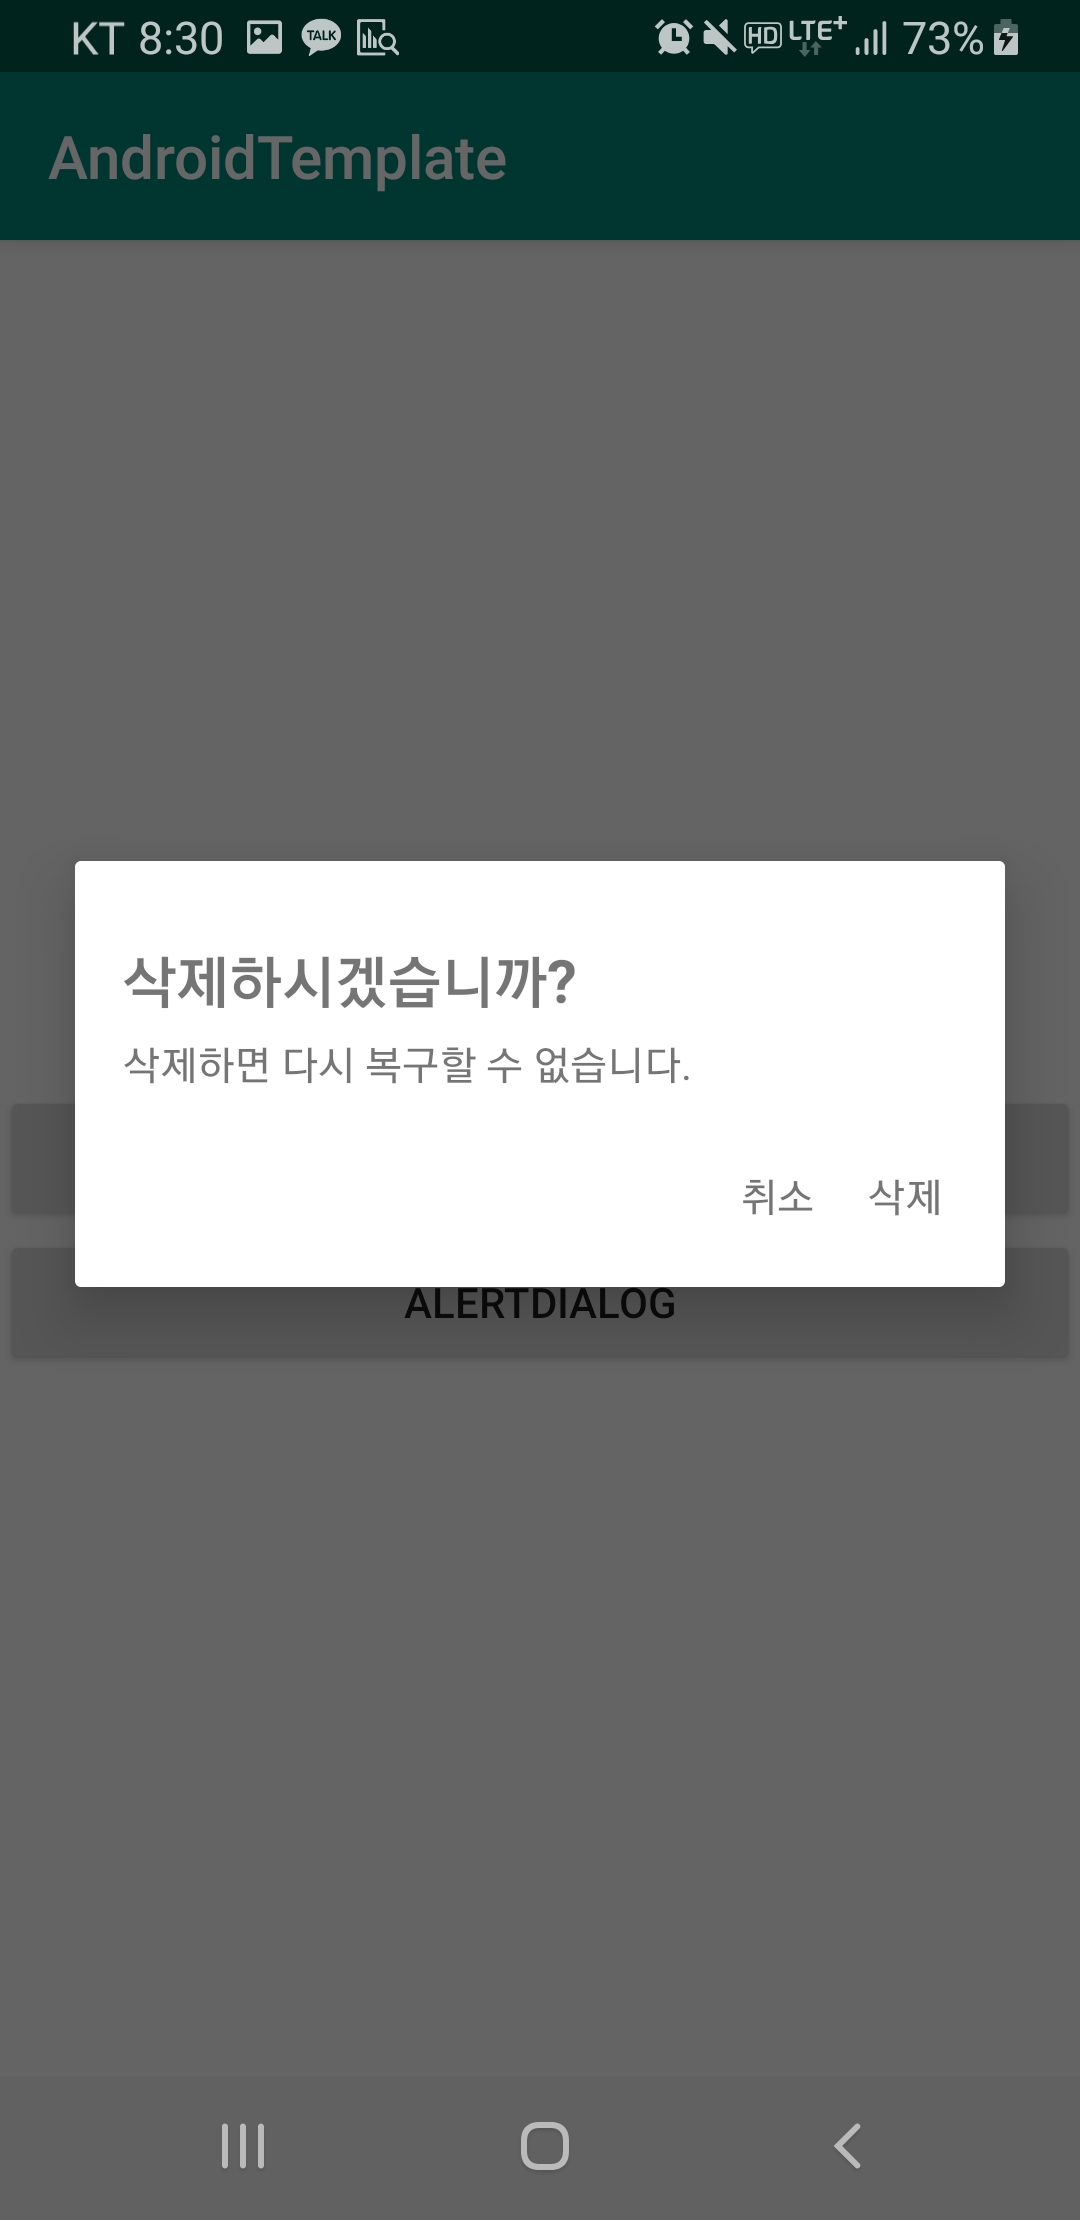
원하는 레이아웃형태 만들기
view_dialog.xml
<?xml version="1.0" encoding="utf-8"?>
<LinearLayout xmlns:android="http://schemas.android.com/apk/res/android"
    android:orientation="vertical"
    android:layout_width="match_parent"
    android:layout_height="match_parent"
    android:padding="16dp">

    <TextView
        android:id="@+id/tv_view_dialog_title"
        android:layout_width="match_parent"
        android:layout_height="wrap_content"
        android:layout_marginTop="10dp"
        android:textSize="20dp"
        android:textStyle="bold" />

    <TextView
        android:id="@+id/tv_view_dialog_content"
        android:layout_width="wrap_content"
        android:layout_height="wrap_content"
        android:layout_marginTop="5dp" />

    <LinearLayout
        android:layout_width="match_parent"
        android:layout_height="wrap_content"
        android:orientation="horizontal"
        android:layout_marginTop="20dp"
        android:gravity="end">

        <TextView
            android:id="@+id/tv_view_dialog_negative"
            android:layout_width="wrap_content"
            android:layout_height="wrap_content"
            android:layout_marginEnd="8dp"
            android:padding="5dp"
            android:foreground="?attr/selectableItemBackground"
            android:text="@string/common_cancel" />

        <TextView
            android:id="@+id/tv_view_dialog_positive"
            android:layout_width="wrap_content"
            android:layout_height="wrap_content"
            android:padding="5dp"
            android:foreground="?attr/selectableItemBackground"
            android:text="@string/common_confirm" />

    </LinearLayout>

</LinearLayout>
CustomDialog.kt
class CustomDialog(
    context: Context,
    title: String,
    content: String? = null
) {

    private val view = LayoutInflater.from(context).inflate(R.layout.view_dialog, null)

    private val dialog = AlertDialog.Builder(context)
        .setView(view)
        .create()

    fun show() {
        dialog.show()
    }

    fun setPositiveButton(buttonTextResId: Int, func: () -> Unit = defaultClickFunc) =
        setPositiveButton(view.context.getString(buttonTextResId), func)

    /*
        이하 코드생략
    */

}
전체코드 보기
class CustomDialog(
    context: Context,
    title: String,
    content: String? = null
) {

    constructor(context: Context, titleResId: Int, contentResId: Int? = null) : this(
        context,
        context.getString(titleResId),
        contentResId?.let { context.getString(it) }
    )

    private val view = LayoutInflater.from(context).inflate(R.layout.view_dialog, null)
    private val titleView = view.tv_view_dialog_title
    private val contentView = view.tv_view_dialog_content
    private val positiveView = view.tv_view_dialog_positive
    private val negativeView = view.tv_view_dialog_negative
    private val defaultClickFunc = { dialog.dismiss() }

    init {
        titleView.text = title
        content?.let {
            contentView.text = it
        } ?: kotlin.run {
            contentView.visibility = View.GONE
        }

        positiveView.setOnClickListener { defaultClickFunc.invoke() }
        negativeView.setOnClickListener { defaultClickFunc.invoke() }
    }

    private val dialog = AlertDialog.Builder(context)
        .setView(view)
        .create()

    fun show() {
        dialog.show()
    }

    fun setPositiveButton(buttonText: String, func: () -> Unit = defaultClickFunc): CustomDialog {
        setTextViewForButton(positiveView, buttonText, func)
        return this
    }

    fun setPositiveButton(buttonTextResId: Int, func: () -> Unit = defaultClickFunc) =
        setPositiveButton(view.context.getString(buttonTextResId), func)

    fun setNegativeButton(buttonText: String, func: () -> Unit = defaultClickFunc): CustomDialog {
        setTextViewForButton(negativeView, buttonText, func)
        return this
    }

    fun setNegativeButton(buttonTextResId: Int, func: () -> Unit = defaultClickFunc) =
        setNegativeButton(view.context.getString(buttonTextResId), func)

    private fun setTextViewForButton(view: TextView, buttonText: String, func: () -> Unit) {
        view.run {
            text = buttonText
            setOnClickListener {
                func.invoke()
                dialog.dismiss()
            }
        }
    }

}
MainActivity.kt
    private fun initViews() {
        btn_main_alert_dialog.setOnClickListener {
            CustomDialog(this, R.string.dialog_delete_title, R.string.dialog_delete_content)
                .setPositiveButton(R.string.common_delete) {
                    showToast(R.string.message_delete_complete)
                }
                .show()
        }
    }
핵심은 인플레이팅한 커스텀 뷰를 AlertDialog에 setView하는 것이다.
기존의 AlertDialog를 대체할 Dialog를 만들었지만
전혀 다른 방식으로 간단한 선택창 또는 도움창 등을 보여주는데 사용할 수 있다.